
On Monday, September 24, during 2018 Ignite conference, Microsoft announced the public preview of SQL Server 2019 (vNext). CTP 2.0 version (Community Technology Preview) is now accessible for everyone. In this blog post, I will provide a step-by-step guide (with screenshots) on SQL Server 2019 installation on Windows. If you are a novice SQL Server user or have not had the opportunity to install SQL Server instance before, you might find this post very helpful.
Download SQL Server 2019
To download the preview version of the newest SQL Server, go to https://www.microsoft.com/evalcenter/evaluate-sql-server-2019-ctp. To download the installer you need to fill a short form and provide your contact information.
 After you provide the necessary data and click the Continue button, the download process is initiated. This installer file is very small and should be downloaded in seconds.
![]()
Run the installer
When you run the installer you get three options to install SQL Server 2019 (vNext) CTP2.0.

Basic
The first option enables you to install the SQL Server Database engine with default configuration. It’s the quickest solution however it doesn’t give you almost any flexibility. I won’t describe this one in this post.
Custom
The second option downloads all necessary files and starts the installation wizard allowing you to change components and settings for your installation. When the download is completed the SQL Server 2019 Installation Center is started.


Downloaded files are the same files you can find in the ISO image you can download using the third Download Media option.

Download Media
Thanks to the third option you’re able to download the SQL Server 2019 ISO file. This gives you the possibility to install SQL Server on machines without internet access or just to download it once and install it many times on various machines. This is my preferred option.
Installation using downloaded files
To start the installation you have to run the setup.exe file from the downloaded files (option 2) or mounted ISO file (option 3). This starts SQL Server 2019 Installation Center. This tool looks exactly the same as in previous versions and provides same various functionalities and possibilities. That includes requirements checking, documentation, installation, and some additional tools.
To install SQL Server choose the Installation option in the menu on the left side.

Next, choose the New SQL Server stand-alone installation or add features to an existing installation.

That will start SQL Server vNext CTP2.0 Setup.
SQL Server vNext CTP2.0 Setup
On the first pane, you have to choose an edition and eventually specify product key. Because SQL Server 2019 CTP2.0 is available only as the evaluation version you don’t have to provide anything and can just click the Next button.

On the next pane, you have to accept license terms and privacy statement. To do that, check the checkbox. Then you can click the Next button to continue.

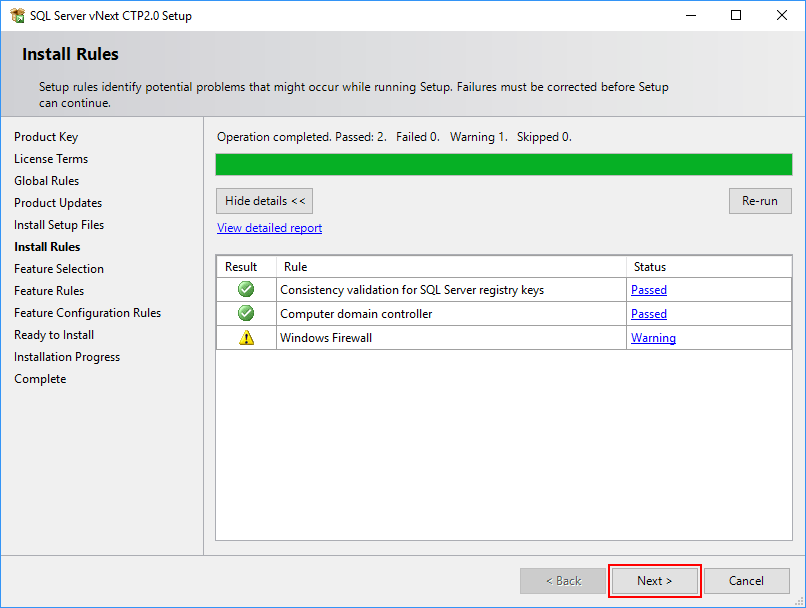
As a next step, the installer will check Installation Rules to verify if the installation can be continued without any issues. When the check is done and there are no issues you can click the Next button to continue.
You may ignore Firewall warning if you will access SQL Server only from the same machine. Otherwise, you need to change Firewall rules to allow inbound connections. More details about Windows Firewall configuration for SQL Server 2019 can be found here.
The Feature Selection pane allows you to chose what components do you want to install and in what directories. By default, all components are not selected. More details about each particular feature can be found in this documentation.
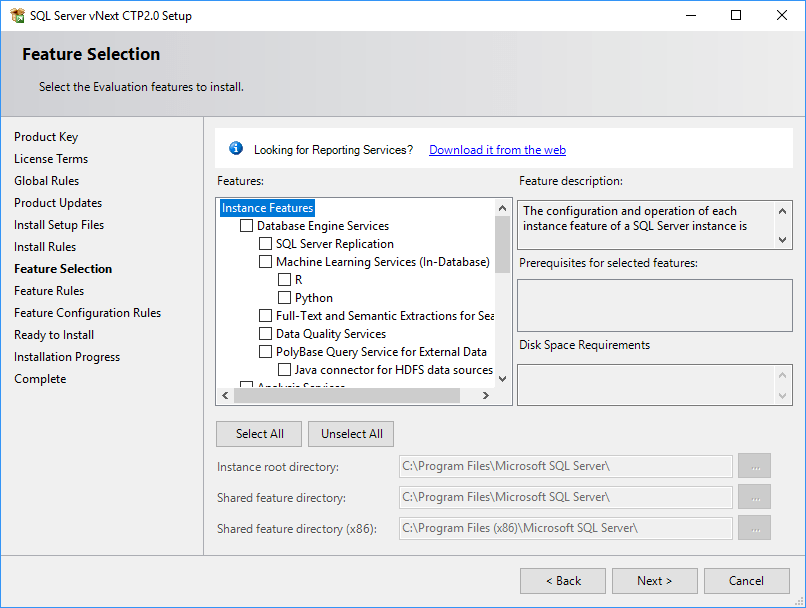
To install all features of SQL Server 2019 Database Engine select them all and then click the Next button.

As a next step, the installer will check installation rules for all features you selected. If everything is OK then you can click the Next button to continue.
However, if something goes wrong and installer discovers that certain requirements are not met you have to take some actions to resolve listed issues.

For example, if you already have the PolyBase installed with some previous version of SQL Server on this machine then you will have to uninstall it first. Otherwise, SQL Server 2019 installer won’t let you continue installation because “PolyBase can be installed on only one SQL Server instance per computer”.

If you run into this issue during your installation I encourage you to check my another post in which I show how to uninstall PolyBase feature.
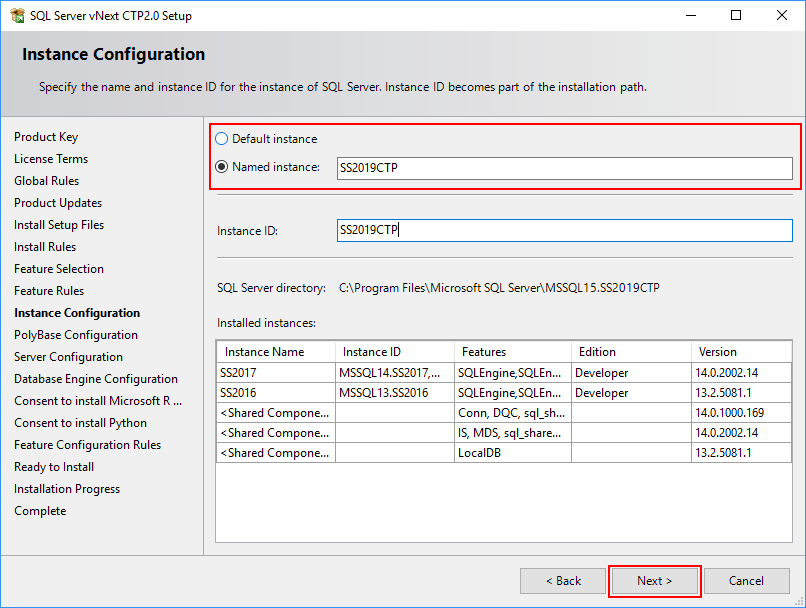
When all Feature Rules are passed then you have to decide if you want to install Default or Named instance. In my case, it will be named instance with SS2019CTP name. Click the Next button to continue.
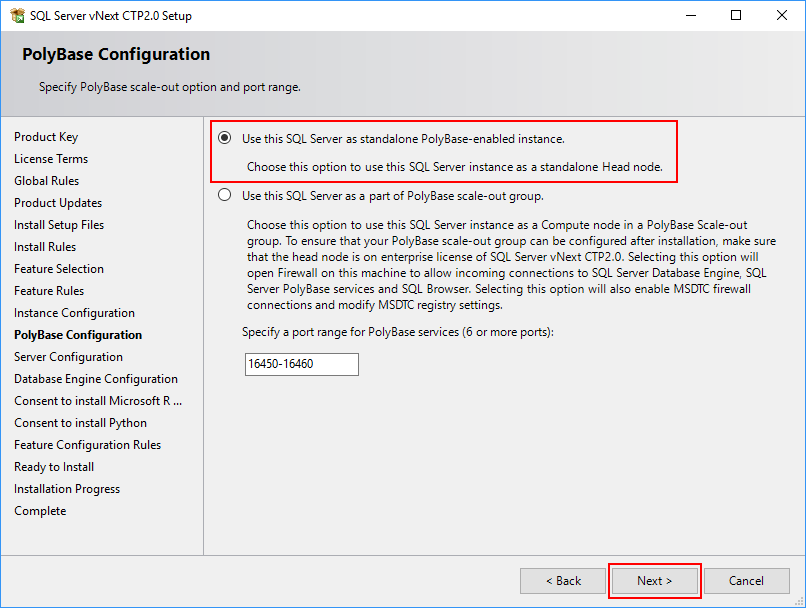
If you decided to install PolyBase feature, then now you have to choose if you want to have a standalone PolyBase instance or make it a part of PolyBase scale-out group. In my case, it will be a standalone instance. I’m also not going to change default PolyBase port range. To continue, click the Next button.
The next page – Server Configuration – hast two tabs. The first tab allows you to set up service accounts for various services that will be installed. If you want to use domain accounts for your services (a good practice in big enterprise environments), then you have to provide here appropriate domain accounts and their respective passwords. If it is just your local installation that you want to have for your own purposes, then you can leave here default virtual accounts. Virtual windows accounts will be generated automatically and you don’t have to bother to manage their passwords. In this place, you can also decide whether you want these services to start automatically during system start or not.
Remember to check the “Grant Perform Volume Maintenance Rask privilege…” checkbox. This will speed up some of the disk operations performed by your new SQL Server 2019 instance.

On the second tab, you can choose a default collation for your SQL Server instance. If you don’t know what the collation is you better leave it unchanged. Click the Next button to continue.

Database Engine Configuration page has four tabs. On the Server Configuration tab, you have to specify authentication mode and administrators for the Database Engine. If you want to use only Windows accounts, then choose Windows authentication mode. If you want to use Windows and SQL accounts, then choose Mixed Mode. As a next step, you have to provide the password you want to have for SQL Server system administrator account (sa). The last step on this tab is to specify Windows accounts that should have System Administrator permissions. You can use the Add Current User button to easily add yourself to this list.

On Data Directories tab you can specify default directories for your data and log files. It is a good practice to separate system databases from user databases and put their data files and transaction log files on different drives.

On the TempDB tab, you can configure the number, the size, and the location of TempDB data and transaction log files. Busy systems require many TempDB data files to avoid page contention. If you’re installing this instance just for yourself you can leave default settings.

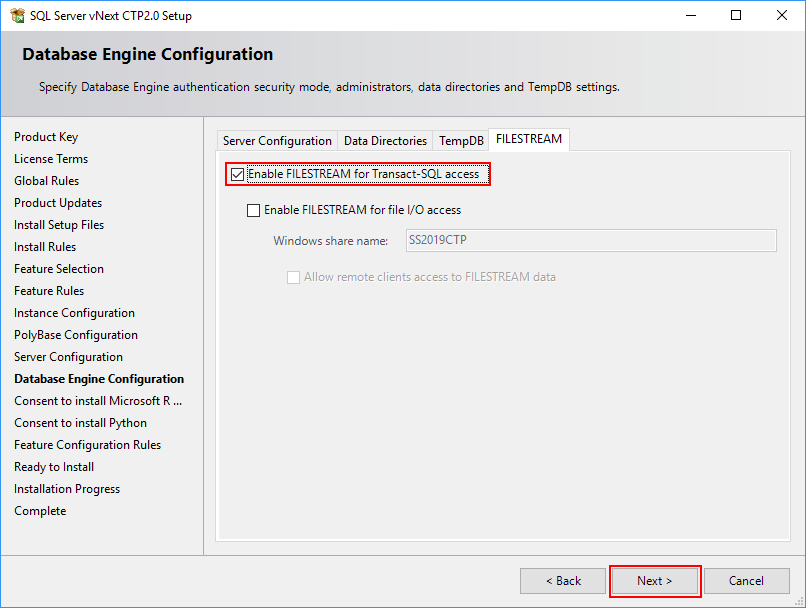
On the Filestream tab, you can decide if you want to have the Filestream feature enabled. To continue, click the Next button.
If you earlier decided to install R as part of the Machine Learning Services, now you need to give your consent to download and install the Microsoft R Open. To do so, you have to click the Accept button, then you can click the Next button to continue.
 If you want to install Python you also need to give your consent to download and install the Anaconda (python distribution). To do so, you have to click the Accept button, then you can click the Next button to continue.

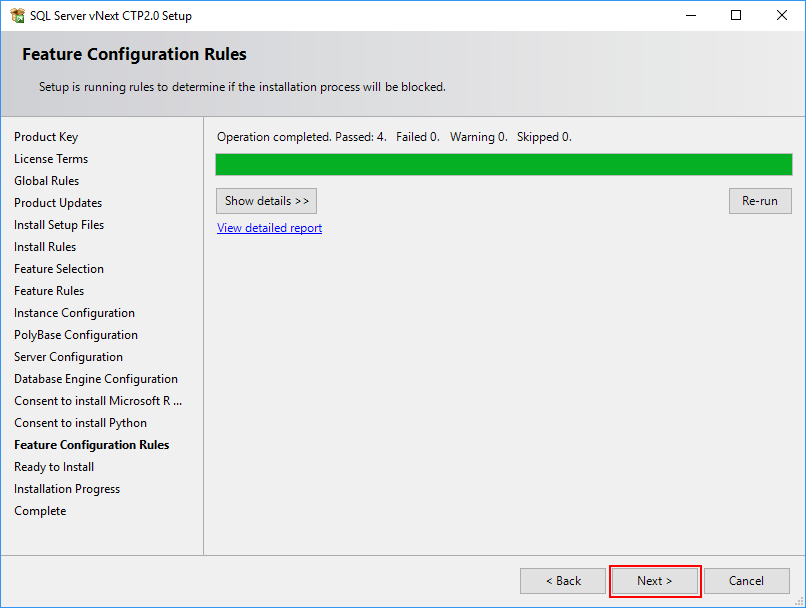
When all of this is already done, the Setup will check Feature Configuration rules. If any of these rules fail, you have to work on a solution. Otherwise, the installation will be stopped. If all checks successfully passed, click the Next button to continue.
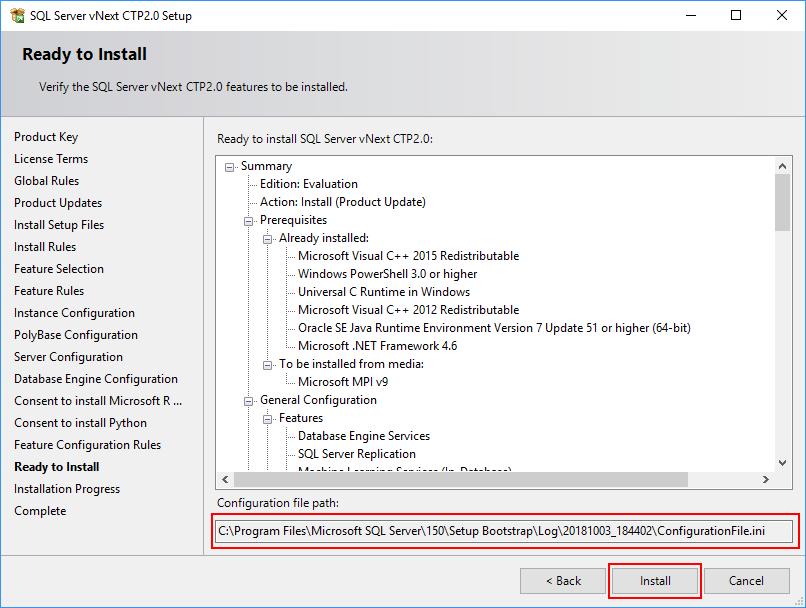
The Ready to Install page is the last page before the installation process is started. You can double check here what you configured so far and what will be done during installation. These configuration settings are also saved in ConfigurationFile.ini. This file can be later used for unattended installation. To install SQL Server 2019 and all chosen features click the Install button.
Installation may take 10-15 minutes, depending on the machine.

Finally, when installation is Done, you may be prompted that additional computer restart is required. Click the OK button to confirm.
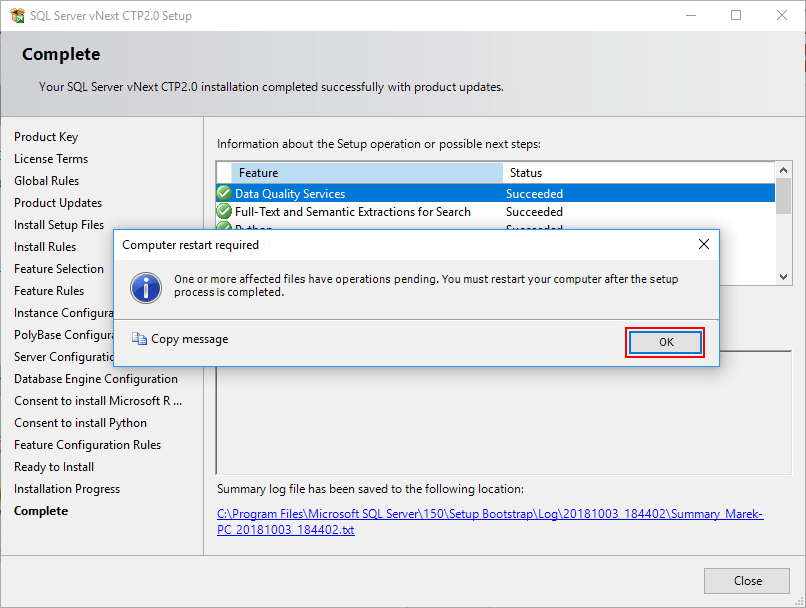
You may now review statuses for every feature installation. Everything is also logged into the Summary log file. Thanks to that, you can review your installation results later.

That’s it! Now you can enjoy your new SQL Server 2019 instance!
If something is unclear or you would like to get more help or explanation then please write a comment.
-Marek
Share it:
Great job/
Simply superb
I successfully installed this on my local machine . There was error to download JRE 7 update and it was resolved and re run ths setup. I will do some validation and later some basic testing with 2019 .
Thanks again for this post that make me interesting to install . I would like to install this again with config file .
Easy to Understand the installtion of 2019
That was Excellent . Thank you